准备
建议设置一个完整域名的主机名。
输入命令 hostname -f 查看当前的主机名
mx.example.com$ hostname -f
mx.example.com在 Debian/Ubuntu 系统上,主机名需要在两个文件里设置:/etc/hostname 和 /etc/hosts。
/etc/hostname:短名称(子域)
mx/etc/hosts里定义主机名和 IP 地址的对应关系。注意:一定要将 邮件 主机名列在第一个。
127.0.0.1 mx.example.com mx localhost localhost.localdomain确认系统已使用设置好的 域名 作为主机名。如果没有生效,请重启系统。
第 1 步:更新系统
确保您的系统正在运行最新版本的操作系统。
sudo apt -y update
sudo apt -y upgrade
系统升级后,我们建议重新启动。
sudo systemctl reboot第 2 步:设置您的服务器主机名
将服务器主机名设置为您的 DNS 服务器中配置的子域名。
export HOSTNAME="mail.example.com"
sudo hostnamectl set-hostname $HOSTNAME --static
sudo hostnamectl set-hostname $HOSTNAME --transient
更新您的主机名后,注销并再次登录以更新您的工作环境。
$ logout现在将主机 IP 地址和 DNS 名称映射添加到 /etc/hosts 文件。
# Example$ sudo vim /etc/hosts
45.77.19.6 mail.example.com要确认 DNS 解析,首先安装 dns-utils 包。
sudo apt -y install dnsutils然后使用主机命令进行本地解析。
$ host mail.example.com
mail.example.com has address 45.77.19.6
要在 DNS 服务器中记录,请使用 dig 命令。
$ dig A mail.example.com第 3 步:下载最新版本的 iRedMail
apt-get update && apt-get upgrade -y
apt-get install git -y
git clone https://github.com/iredmail/iRedMail.git
第 4 步:在 Debian 11 上安装 iRedMail
为在 Debian 11 上自动安装 iRedMail 邮件服务器提供了安装程序脚本。
cd iRedMail启动 iRedMail 安装程序。
bash iRedMail.sh安装程序脚本将安装所需的依赖项,然后询问您在 Debian 11 / Debian 10 Linux 系统上设置 iRedMail 邮件服务器所需的几个简单问题。
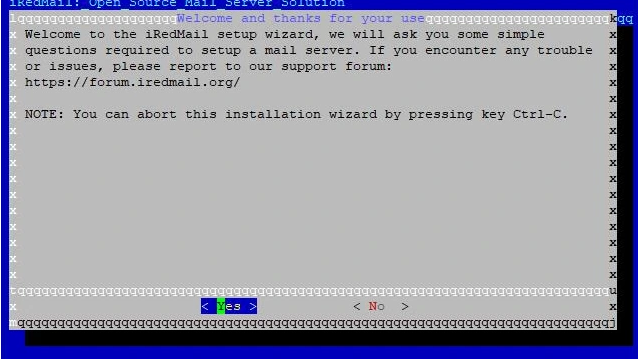
1 – 接受安装向导
第一个屏幕询问您是接受还是拒绝在 Debian 上安装 iRedMail。
2 – 指定用于存储邮箱的目录
确保在更改默认邮箱存储目录之前阅读提供的注释。

3 – 选择要使用的网络服务器
使用默认选择的 nginx。

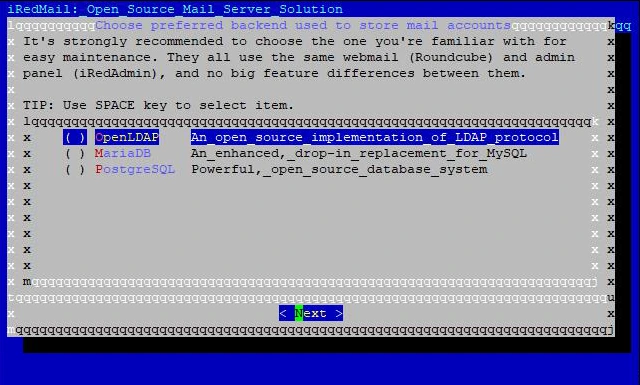
4 – 选择用于存储邮件帐户的后端
选择您熟悉的,安装后更易于管理和维护。这里我选择了 MariaDB。
5 – 指定 LDAP 后缀
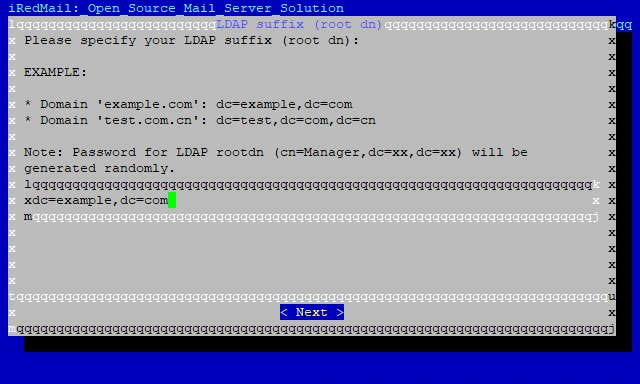
如果您选择 OpenLDAP 作为存储邮件帐户的默认后端,请提供 LDAP 后缀。这些只是您的域名的组成部分。
6 – 设置 MySQL 根密码
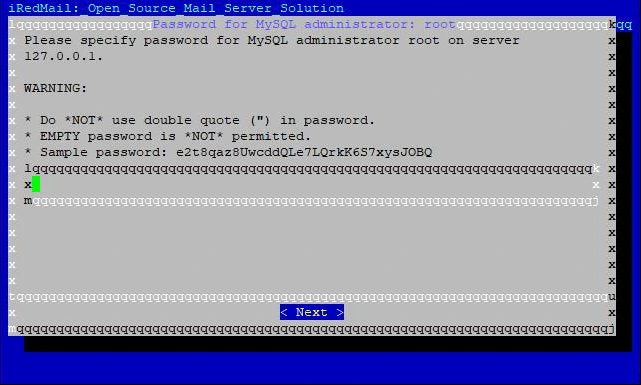
提供 MySQL root 用户的密码。
7 – 添加您的第一个邮件域名
提供您的邮件域名 - 这不能与服务器名称相同。
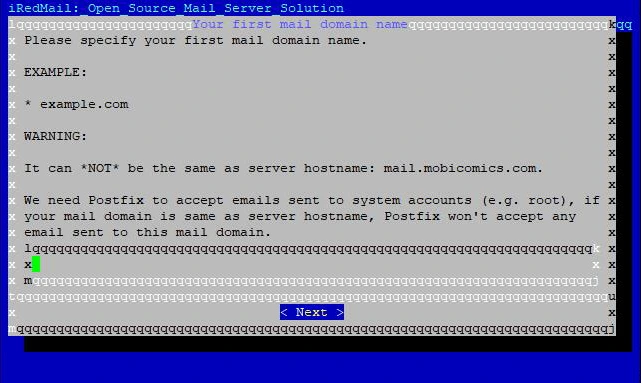
8 – 为邮件域管理员提供密码
输入邮件域管理员密码
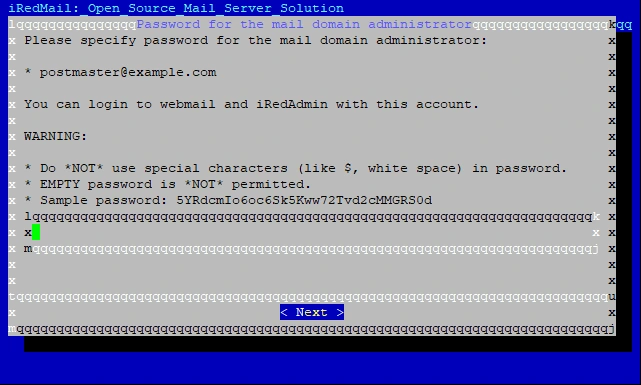
9 – 勾选要启用的功能。
根据自己需要选择要开启的功能
- Roundcubemail --- 网页邮件客户端
- SoGo --- 多人协同管理软件
- netdate --- 邮件服务器健康监控系统
- iRedAdmin --- 邮件服务器管理面板
- Fail2ban --- 密码锁
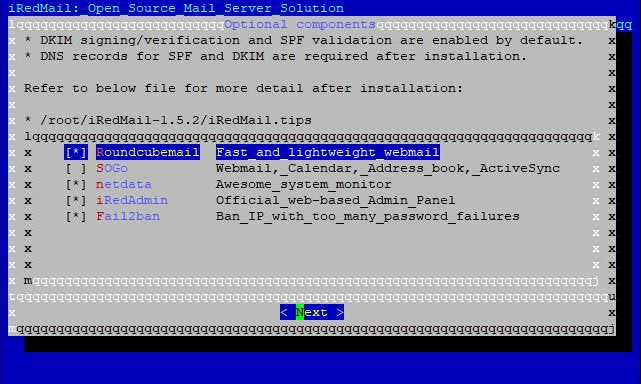
10 – 查看提供的值并开始安装。
***************************** WARNING ***********************************
*************************************************************************
*                                                                       *
* Below file contains sensitive infomation (username/password), please  *
* do remember to *MOVE* it to a safe place after installation.          *
*                                                                       *
*   * /home/debian/iRedMail-1.0/config
*                                                                       *
*************************************************************************
********************** Review your settings *****************************
*************************************************************************

* Storage base directory:               /var/vmail
* Mailboxes:
* Daily backup of SQL/LDAP databases:
* Store mail accounts in:               OpenLDAP
* Web server:                           Nginx
* First mail domain name:               example.com
* Mail domain admin:                    postmaster@example.com
* Additional components:                Roundcubemail SOGo netdata iRedAdmin Fail2ban

< Question > Continue? [y|N] y
键入 y 或Y并按 Enter 开始安装。该脚本将自动安装和配置所有需要的打包文件。
您可以选择启用 iRedMail 防火墙。
*************************************************************************
* iRedMail-1.0 installation and configuration complete.
*************************************************************************

< Question > Would you like to use firewall rules provided by iRedMail?
< Question > File: /etc/default/iptables, with SSHD ports: 22. [Y|n]y
[INFO] Copy firewall sample rules.
< Question > Restart firewall now (with ssh ports: 22)? [y|N]y
[INFO] Restarting firewall ...
[INFO] Updating ClamAV database (freshclam), please wait ...
.....
重新启动您的服务器以启用邮件服务。
sudo systemctl reboot第 5 步:iRedMail 访问信息
如果脚本以 root 用户身份运行,您的 iRedMail 服务器详细信息和访问信息存储在文件“/root/iRedMail-1.0/config”中,如果脚本 正常 执行 , 则存储在“/home/$USER/iRedMail-1.0/config”文件中用户。
在 Debian 11 上成功安装 iRedMail 后,会显示已安装 Web 应用程序的 URL。
- Roundcube 网络邮件:[https://your_server/mail/]
- SOGo 群件: [https://your_server/SOGo]
- Web 管理面板 (iRedAdmin):[https://your_server/iredadmin/]
- Awstats:[https://your_server/awstats/awstats.pl?config=web](或
?config=smtp用于 SMTP 流量日志)我的输出如下所示。
********************************************************************
* URLs of installed web applications:
*
* - Roundcube webmail: https://mail.example.com/mail/
* - SOGo groupware: https://mail.example.com/SOGo/
* - netdata (monitor): https://mail.example.com/netdata/
*
* - Web admin panel (iRedAdmin): https://mail.example.com/iredadmin/
*
* You can login to above links with below credential:
*
* - Username: postmaster@example.com
* - Password: password
*
*
********************************************************************
* Congratulations, mail server setup completed successfully. Please
* read below file for more information:
*
*   - /home/debian/iRedMail-1.0/iRedMail.tips
*
* And it's sent to your mail account postmaster@example.com.
*
********************* WARNING **************************************
使用保存的信息登录门户。
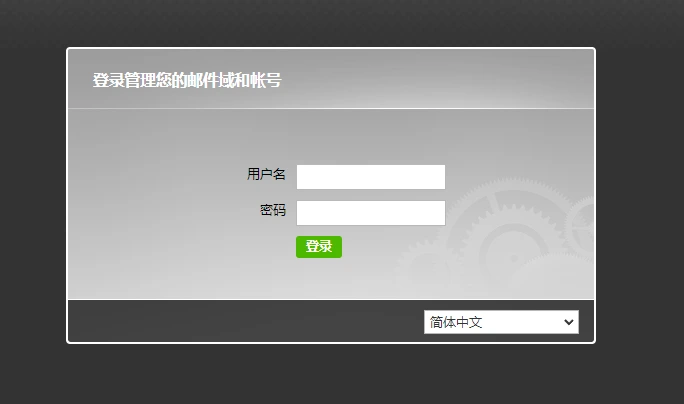
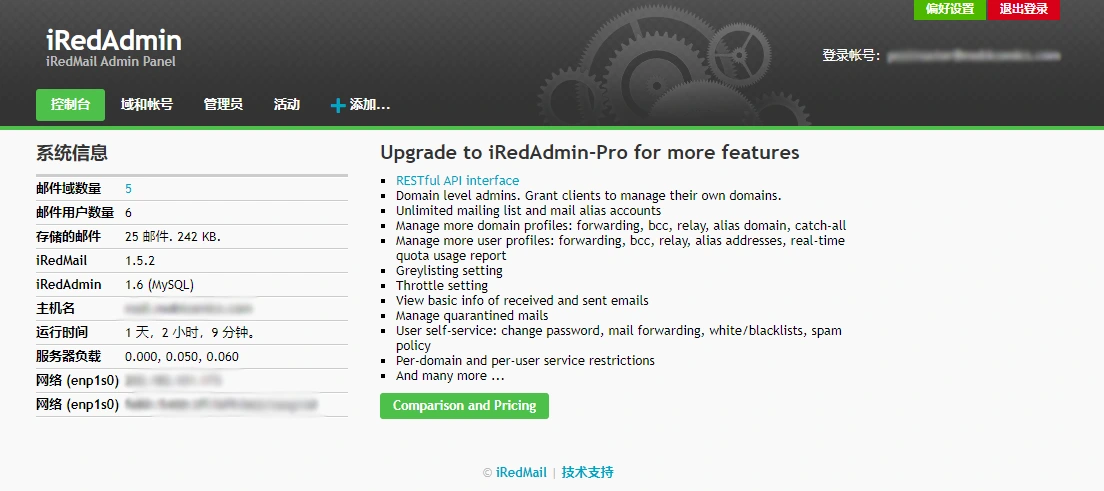
这是在 iRedadmin 登录后,仪表板的默认外观。
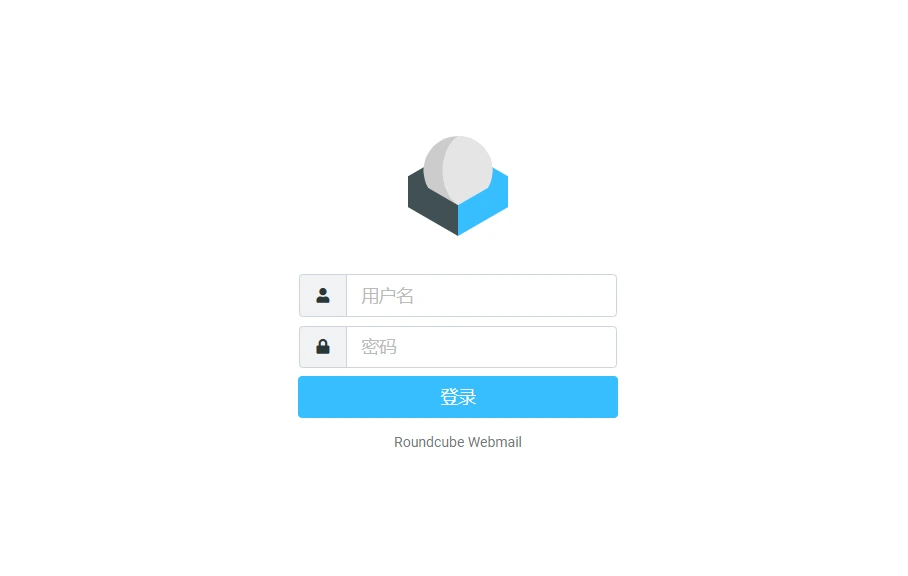
在 /mail 上访问邮件客户端。
第 6 步:使用 SSL 证书保护 iRedMail
第 1 步:获取 Let's Encrypt 证书
安装用于获取 Let's Encrypt SSL 证书的 certbot 工具。
# Install certbot on Debian 11
sudo apt update
sudo apt install certbot
安装 certbot-auto 工具后,保存 iRedMail 服务器的电子邮件地址和域。
DOMAIN="mail.example.com"
EMAIL="postmaster@example.com"
停止 Nginx 服务。
sudo systemctl stop nginx为 iRedMail 邮件服务器获取免费的 Let's Encrypt 证书。
sudo certbot certonly --standalone -d $DOMAIN --preferred-challenges http --agree-tos -n -m $EMAIL --keep-until-expiring
或者
certbot certonly --webroot -d    mail. 你的域名   -w /var/www/html/
Let's Encrypt 的标准成功消息输出证书的路径。
IMPORTANT NOTES:
 - Congratulations! Your certificate and chain have been saved at:
   /etc/letsencrypt/live/mail.example.com/fullchain.pem
   Your key file has been saved at:
   /etc/letsencrypt/live/mail.example.com/privkey.pem
   Your cert will expire on 2020-01-23. To obtain a new or tweaked
   version of this certificate in the future, simply run certbot-auto
   again. To non-interactively renew *all* of your certificates, run
   "certbot-auto renew"
 - If you like Certbot, please consider supporting our work by:

   Donating to ISRG / Let's Encrypt:   https://letsencrypt.org/donate
   Donating to EFF:                    https://eff.org/donate-le
第 2 步:替换 iRedMail 自签名证书
重命名 iRedMail.crt 自签名证书和私钥。
mv /etc/ssl/certs/iRedMail.crt{,.bak}
mv /etc/ssl/private/iRedMail.key{,.bak}
为 Let's Encrypt 证书和私钥创建符号链接。
ln -s /etc/letsencrypt/live/mail.example.com/fullchain.pem /etc/ssl/certs/iRedMail.crt
ln -s /etc/letsencrypt/live/mail.example.com/privkey.pem /etc/ssl/private/iRedMail.key
重新启动 iRedMail 服务器以使服务使用新证书。
sudo reboot第 3 步:设置证书自动续订
创建一个 cron 作业以自动更新 Let's Encrypt 证书:
$ sudo crontab -e# Renew Let's Encrypt certs
15 3 * * * /usr/bin/certbot renew --pre-hook "systemctl stop nginx" --post-hook "systemctl start nginx"添加 Let's Encrypt SSL 证书后,邮件客户端应用程序(MUA,例如 Outlook、Thunderbird)不应警告您证书无效。与在浏览器上访问 Webmail 客户端相同。
第 4 步:更新域名 MX 记录
您添加的域名的 MX 记录应该修改为指向 iRedMail 服务器。
更新域名的 DNS 记录后,可在邮件服务器上使用 dig 命令确认填充。
$ dig MX example.com
优化 iRedMail 邮件服务器
iRedMail 在安全性这方面占用了服务器很大的资源,往往收信出现问题都跟这个有关系。自建的邮件服务器性能都不会很好,而优化服务器,其实就是在安全与性能之间做了取舍,舍弃了安全性,所以当你优化完服务器的时候,你的邮件在安全性这方面就没有什么保障了。
第 1 步:禁用反病毒 clamav,并保留 DKIM
由于 iredmail 安装时会一起安装病毒扫描程序 ClamAV,而 ClamAV 会占用所有可能的内存,除非你的服务器有着足够的内存。要不然对于内存比较小的服务器来说,那就是噩梦。
- 在 Postfix 配置文件
/etc/postfix/main.cf中保留content_filter = smtp-amavis:[127.0.0.1]:10024 - 在 Amavisd 配置文件
/etc/amavis/conf.d/50-user中找到以下行
# @bypass_virus_checks_maps = (1);
# @bypass_spam_checks_maps  = (1);
取消上述行的注释(删除每行开头的“#”),如果括号数字为 (0) 就改为(1)
- 同一 Amavisd 配置文件中的另一个位置:
$policy_bank{'ORIGINATING'} = {
    ...
    # Bypass checks
    #bypass_spam_checks_maps => [1],    # don't check spam
    #bypass_virus_checks_maps => [1],   # don't check virus
    #bypass_banned_checks_maps => [1],  # don't check banned file names and types
    #bypass_header_checks_maps => [1],  # don't check bad header
};
取消 # Bypass checks 以下四行的注释(删除每行开头的“#”)以禁用垃圾邮件 / 病毒扫描。
- 重新启动 Amavisd 服务。
/etc/init.d/amavis restart- 禁止 ClamAV 自启动
systemctl mask clamav-daemon clamav-freshclam第 2 步:白 / 黑名单、灰名单管理
- 禁用全局灰名单
python3 /opt/iredapd/tools/greylisting_admin.py --disable --from '@.'打开 iRedAPD 插件配置文件
/opt/iredapd/settings.py找到# Enabled plugins. plugins = ["reject_null_sender", "wblist_rdns", "reject_sender_login_mismatch", "greylisting", "throttle", "amavisd_wblist", "sql_alias_access_policy"]删掉
"greylisting",重启 iRedAPD 服务systemctl restart iredapd - 禁用全局白 / 黑名单打开 iRedAPD 插件配置文件
/opt/iredapd/settings.py找到# Enabled plugins. plugins = ["reject_null_sender", "wblist_rdns", "reject_sender_login_mismatch", "greylisting", "throttle", "amavisd_wblist", "sql_alias_access_policy"]删掉
"amavisd_wblist",重启 iRedAPD 服务systemctl restart iredapd - 不想关黑名单也可以加白名单要将邮件的域名或者 IP 地址列入白名单,例如 ,
qq.com,163.com请运行如下命令:cd /opt/iredapd/tools/ python3 spf_to_greylist_whitelists.py qq.com 163.com
第 3 步:配置 postscreen
- 打开 postfix 配置文件
/etc/postfix/master.cf找到smtp inet n - - - 1 postscreen修改为smtp inet n - - - - smtpd - 打开 postfix 配置文件
/etc/postfix/main.cf找到smtpd_recipient_restrictions = check_policy_service inet:127.0.0.1:7777将check_policy_service inet:127.0.0.1:7777去掉,一共二处 - 重启 postfix
systemctl restart postfix.service弄完上面这一系列优化后,重启服务器。